
Complete Torres del Paine Trekking Guide 2025: W Trek vs O Trek
Whether you’re considering the famous W Trek or the more challenging O Circuit (Full Circuit), this guide provides everything you need to plan, prepare, and execute an unforgettable Torres del Paine adventure. Drawing from partnerships with local guides who’ve been leading treks here for over two decades, we’ll share insider knowledge you won’t find in standard guidebooks.

Whether you’re considering the famous W Trek or the more challenging O Circuit (Full Circuit), this guide provides everything you need to plan, prepare, and execute an unforgettable Torres del Paine adventure. Drawing from partnerships with local guides who’ve been leading treks here for over two decades, we’ll share insider knowledge you won’t find in standard guidebooks.
Last Updated: September 2025 | Reading Time: 35 minutes
Table of Contents
Introduction: Why Torres del Paine Should Top Your Patagonia List {#introduction}
Torres del Paine National Park stands as Chilean Patagonia’s crown jewel, offering some of the world’s most spectacular trekking through landscapes that seem designed by the gods themselves. Rising dramatically from the Patagonian steppe, the granite towers (torres) and horn-shaped peaks (cuernos) create a playground for adventurers that attracts over 250,000 visitors annually. The park’s 227,298 hectares encompass glacial lakes, ancient forests, windswept grasslands, and towering granite spires that have inspired countless photographers, filmmakers, and adventurers since its establishment in 1959.
🎥 Watch Our Complete Torres del Paine Documentary (15-minute aerial and ground footage showcase)
But Torres del Paine is more than just Instagram-worthy peaks. This is where glacial lakes shimmer turquoise against black granite walls, where condors soar overhead while guanacos graze below, and where every sunrise brings the possibility of witnessing one of nature’s greatest light shows. The park sits at the convergence of the Andes Mountains and Patagonian steppe, creating unique microclimates and ecosystems that support diverse wildlife populations found nowhere else on Earth.
Solo Adventure Traveler Insight: For solo adventurers, Torres del Paine offers the perfect balance of challenging wilderness and established infrastructure. The well-marked trail system and regular refugio stops provide safety nets while still delivering authentic Patagonian wilderness experiences. Solo travelers often find the refugio social atmosphere ideal for meeting like-minded adventurers from around the globe.
Whether you’re considering the famous W Trek or the more challenging O Circuit (Full Circuit), this guide provides everything you need to plan, prepare, and execute an unforgettable Torres del Paine adventure. Drawing from partnerships with local guides who’ve been leading treks here for over two decades, we’ll share insider knowledge you won’t find in standard guidebooks. Our comprehensive approach combines practical logistics with cultural insights, environmental education, and safety protocols developed through thousands of guided expeditions.
For those planning your route from Torres del Paine to Argentine Patagonia, our complete cross-border planning guide covers seamless travel connections to destinations like El Calafate and Fitz Roy.
External Resources:
CONAF (Chilean Forest Service) Official Park Information – Current regulations and conditions
Torres del Paine Legacy Fund – Park conservation initiatives
Patagonia National Geographic Guide – Additional background and planning resources
The Complete Trek Breakdown: W Trek vs O Circuit {#trek-comparison}
The W Trek: Patagonia’s Greatest Hits (4-5 Days)
The W Trek covers approximately 80 kilometers over 4-5 days, hitting the park’s three most iconic viewpoints: the Base Torres, Cuernos del Paine, and French Valley. Named for its W-shaped route on the map when viewed from above, this trek offers maximum scenic impact with moderate physical demands, making it accessible to adventurers with good fitness levels but limited high-altitude or technical experience. The route was designed in the 1970s to showcase the park’s diverse landscapes while maintaining manageable daily distances and reliable accommodation options.
🎥 W Trek Route Overview (8-minute drone footage showing the complete W route)
W Trek Highlights:
Base Torres: The iconic granite towers at sunrise, rising 2,850 meters above sea level with some of the most dramatic granite formations in South America. The towers were formed by magma intrusion approximately 12 million years ago, creating the distinctive spires that have become synonymous with Patagonian adventure. Early morning alpenglow transforms the grey granite into brilliant reds and oranges, creating one of the world’s most sought-after wilderness photography opportunities.
Cuernos del Paine: Horn-shaped peaks reflected in Nordenskjöld Lake, featuring distinctive black sedimentary caps over grey granite bases that create their characteristic “horn” appearance. These formations represent millions of years of geological activity, where softer sedimentary layers protected underlying granite from erosion. The lake’s turquoise color comes from glacial flour – finely ground rock particles suspended in the water that scatter blue light while absorbing longer wavelengths.
French Valley: Glacial amphitheater with hanging glaciers, surrounded by vertical granite walls rising over 1,000 meters from the valley floor. The valley acts as a natural sound amplifier, where ice avalanches and rockfall create thunderous echoes that demonstrate the ongoing geological processes shaping this landscape. Multiple hanging glaciers cling to the surrounding peaks, remnants of the larger ice sheet that carved this dramatic valley over millennia.
Grey Glacier: Massive glacier and iceberg-dotted lake, representing part of the Southern Patagonian Ice Field, the world’s third-largest ice cap after Antarctica and Greenland. The glacier has retreated significantly in recent decades due to climate change, providing visitors with visible evidence of global warming impacts. Icebergs calving from the glacier terminus create constantly changing ice sculptures that drift across the lake’s surface.
Total Distance: ~80km over 4-5 days with daily distances ranging from 11-18km
Difficulty: Moderate to challenging, requiring good cardiovascular fitness equivalent to hiking 6-8 hours daily with a 15-20kg backpack
Best For: First-time Patagonia trekkers, limited time visitors, those seeking iconic viewpoints without extreme technical challenges
Solo Adventure Traveler Expert Tip: The W Trek’s refugio system creates natural social opportunities for solo travelers. Many adventurers arrive alone but form temporary hiking partnerships at refugios, sharing costs for boat transfers and creating safety backup systems. The standardized trail markers and regular accommodation stops make this an ideal introduction to Patagonian adventure travel for solo explorers building confidence for more remote expeditions.
The O Circuit: Complete Park Circumnavigation (7-9 Days)
The O Circuit (Full Circuit) encompasses the entire W Trek plus an additional “backside” section, creating a complete loop around the Paine Massif. This 130-kilometer journey includes everything the W Trek offers plus remote wilderness sections, additional glacial viewpoints, and the challenging John Gardner Pass at 1,241 meters elevation. The backside section, added to create the full circuit experience, takes trekkers through areas where wildlife encounters increase significantly due to reduced human presence and where weather conditions become more extreme and unpredictable.
Solo Adventure Traveler Expert Tip: The O Circuit’s backside section offers some of Patagonia’s most authentic wilderness experiences for solo adventurers. However, the remote sections between Dickson and Las Carretas require advanced preparation and self-sufficiency skills. Solo trekkers should carry satellite communication devices, have extensive wilderness experience, and inform park rangers of their detailed itinerary including planned daily positions for safety monitoring.
O Circuit Additional Highlights:
John Gardner Pass: Spectacular glacier overlook at the circuit’s highest point, offering panoramic views across the Southern Patagonian Ice Field that stretches to the horizon. The pass represents the continental divide where Pacific and Atlantic watersheds separate, creating unique weather patterns as moisture-laden winds from different directions converge. On clear days, trekkers can see dozens of glaciers flowing from the ice field, providing perspective on the massive scale of this frozen wilderness.
Paso de los Vientos: “Windy Pass” with extreme weather challenges where wind speeds regularly exceed 100 km/h and can reach over 200 km/h during storm events. This exposed section tests trekkers’ gear, physical strength, and mental resilience as they traverse loose scree and boulder fields while battling hurricane-force winds. The pass earned its name from local gauchos who lost livestock to extreme weather, and modern trekkers must carefully time their crossing based on detailed weather forecasts.
Remote Wilderness: Fewer crowds, more wildlife encounters including increased probability of puma sightings, particularly around Dickson Lake and the Pampas section. The reduced human presence allows for more natural wildlife behavior observations, with guanaco herds moving freely and condor populations undisturbed by constant foot traffic. Archaeological evidence suggests indigenous Tehuelche peoples used these remote areas for seasonal hunting camps over thousands of years.
Total Distance: ~130km over 7-9 days with some daily sections reaching 16km over challenging terrain
Difficulty: Challenging to expert level, requiring significant backpacking experience, weather management skills, and physical conditioning for multi-day load carrying
Best For: Experienced trekkers seeking complete immersion, wilderness photographers, adventurers with flexible schedules to accommodate weather delays
External Resources:
Cicerone Guides: Torres del Paine Trekking – Detailed trail maps and elevation profiles
Lonely Planet Torres del Paine Section – Additional planning perspectives
Patagonia Trekking Forums – Current conditions and traveler reports
Quick Comparison Table
AspectW TrekO CircuitDuration4-5 days7-9 daysDistance80km130kmDifficultyModerate-ChallengingChallenging-ExpertCrowdsHigherLower (backside section)AccommodationRefugios + campingMore camping requiredBest SeasonOct-AprilNov-MarchPermit DifficultyModerateHigh (limited spaces)
To determine the best months for Torres del Paine trekking based on weather patterns, crowds, and trail conditions, consult our comprehensive seasonal planning guide.
Day-by-Day W Trek Guide with Video Documentation {#w-trek-guide}
Pre-Trek: Arriving at Torres del Paine
Most trekkers arrive via Puerto Natales (2 hours by bus) or directly from El Calafate, Argentina (5 hours). The park entrance at Laguna Amarga or Las Torres offers the final opportunity to purchase forgotten gear or grab a meal before hitting the trails.
🎥 Getting to Torres del Paine (Transportation options and logistics)
Day 1: Las Torres Base Trek
Route: Hosteria Las Torres → Las Torres Base → Return
Distance: 18km round trip
Duration: 8-10 hours
Difficulty: Challenging
The classic Torres del Paine experience begins with the most demanding day of the W Trek. This out-and-back hike climbs 800 vertical meters through diverse ecosystems, from Patagonian steppe through ancient lenga forests to high-alpine boulder fields, culminating at the base of the three granite towers. The trail was originally a gaucho horse path used to move cattle to high summer pastures, explaining its steep and direct route that prioritizes efficiency over gradual grades.
🎥 Torres Base Trek: Complete Day Documentation (Real-time trek with sunrise footage)
Detailed Breakdown:
0-2 hours: Gradual ascent through estancia land and lenga forest, crossing the Ascencio River on a suspension bridge that provides the first dramatic mountain views. The initial section passes through working estancia land where gauchos still manage cattle herds using traditional horseback methods developed over centuries. Lenga trees (Nothofagus pumilio) create a distinctive Southern Hemisphere beech forest that turns brilliant gold and red during autumn months (March-April).
2-4 hours: Steeper climb with multiple river crossings and technical boulder navigation requiring basic scrambling skills and sure footing. The Ascencio Valley narrows dramatically as the trail gains elevation, creating a natural wind funnel that intensifies weather conditions. Stream crossings can become dangerous during heavy rain when water levels rise rapidly, requiring careful timing and potentially waiting for conditions to improve.
4-5 hours: Final ascent through loose scree and massive granite boulders, including sections where the trail disappears and route-finding skills become essential. This section requires hands-on scrambling over car-sized boulders while managing fatigue and altitude effects. The final moraine approach offers the first glimpses of the towers, building anticipation for the dramatic reveal at the lagoon.
Summit Experience: The glacial lagoon at the base of the towers sits at 884 meters elevation, surrounded by vertical granite walls rising 2,000 meters directly overhead. The towers’ faces catch first light approximately 30 minutes before sunrise, creating the famous alpenglow effect that transforms grey granite into brilliant reds and oranges lasting 15-20 minutes.
Solo Adventure Traveler Expert Tip: Solo trekkers should start this trail no later than 4:30 AM for sunrise timing, but more importantly for safety – afternoon winds make the loose boulder descent extremely hazardous. Many solo adventurers team up with others at Hosteria Las Torres the night before, creating informal safety partnerships for early morning starts and emergency backup. The pre-dawn trail navigation requires confident headlamp skills and familiarity with route markers.
Insider Tips:
Start at 4:30 AM for sunrise at the towers (worth the early start and essential for weather timing)
Bring headlamp with fresh batteries, extra layers for pre-dawn cold, and weatherproof gear for rapidly changing conditions
The final boulder section requires scrambling confidence – while not technically difficult, exposure and loose rock demand careful movement and proper footwear
Water available at Chileno Campsite (midway point) – the last reliable water source before the final ascent
Photography Notes: The towers illuminate in brilliant red-orange during sunrise (approximately 6:30-7:30 AM in peak season, varying by month). Position yourself on the left (eastern) side of the lagoon for classic compositions that include foreground rocks and water reflections. Tripod essential for low-light conditions and long exposures of flowing water.
External Resources:
Mountain-Forecast.com Torres del Paine – Detailed weather forecasting for high-altitude conditions
Climbing Magazine Torres Base Guide – Technical aspects and route descriptions
Day 2: Cuernos del Paine Trek
Route: Las Torres → Cuernos del Paine
Distance: 11km
Duration: 4-5 hours
Difficulty: Moderate
This relatively easy day offers stunning views of the horn-shaped Cuernos peaks reflected in Nordenskjöld Lake’s turquoise waters, providing recovery time after the demanding Torres Base trek while delivering consistently spectacular scenery. The trail follows the lake’s northern shore, offering multiple viewpoints and photography opportunities as the angle of the Cuernos changes throughout the day.
🎥 Cuernos Trek: Lakeside Views & Wildlife (Wildlife encounters and reflection photography)
Route Highlights:
Panoramic views of Nordenskjöld Lake with its distinctive turquoise color created by suspended glacial flour particles
Multiple Cuernos viewpoints with different perspectives as the trail curves around the lake’s shoreline
High probability of guanaco and rhea sightings in the open grasslands between forest sections
Several suspension bridge crossings providing dramatic river and mountain compositions
Best Photography Spots:
Nordenskjöld Lake Viewpoint (1 hour from start): Classic Cuernos reflections with optimal morning light
Suspension Bridge (2 hours): Dramatic river and mountain compositions with rushing water foreground
Cuernos Refugio Area: Close-up Cuernos perspectives with afternoon light on granite faces
Solo Adventure Traveler Expert Tip: This easier day provides excellent opportunities for solo travelers to socialize with other trekkers at viewpoints and bridges. Many lasting trail friendships begin during the relaxed pace of Day 2. Use this day to assess gear performance and make adjustments before the challenging French Valley day ahead.
Day 3: French Valley Exploration
Route: Cuernos → French Valley → Pehoe
Distance: 14km
Duration: 8-9 hours
Difficulty: Challenging
The French Valley delivers one of Patagonia’s most spectacular amphitheater experiences, surrounded by hanging glaciers and vertical granite walls that create a natural cathedral of stone and ice. This demanding day requires early starts and sustained effort but rewards trekkers with arguably the most dramatic scenery in the entire park.
🎥 French Valley: Into the Heart of Torres del Paine (Complete valley exploration with weather challenges)
Valley Highlights:
French Valley Lookout: 360-degree mountain amphitheater views with over a dozen glaciers visible simultaneously
Hanging Glaciers: Multiple active glaciers clinging to vertical walls, with regular ice avalanches creating thunderous echoes
Granite Walls: Vertical faces rising over 1000 meters directly from the valley floor
Weather Drama: Valley acts as natural wind funnel with rapidly changing conditions that can shift from calm to storm within minutes
Key Sections:
Cuernos to French Base (2 hours): Gradual approach through varied terrain with increasing mountain drama and the first views into the valley mouth
French Base to Lookout (1.5 hours): Steep ascent with massive payoff, gaining 400 vertical meters through loose scree and boulder fields
Lookout to Pehoe (4 hours): Descent through varied terrain to Lago Pehoe with changing perspectives of Paine Grande
Solo Adventure Traveler Expert Tip: The French Valley lookout can become crowded during peak hours (11 AM – 2 PM). Solo trekkers have the flexibility to time their arrival for optimal photography light and fewer crowds – either very early morning or late afternoon visits provide better experiences and dramatic lighting conditions.
Weather Considerations: The French Valley acts as a natural wind tunnel, channeling and amplifying weather systems. Even on calm days elsewhere in the park, expect strong gusts in the valley. Pack wind-resistant gear and be prepared for rapid weather changes that can make the lookout dangerous during severe conditions.
Day 4: Grey Glacier Experience
Route: Pehoe → Grey Glacier → Grey Refugio
Distance: 11km
Duration: 4-5 hours
Difficulty: Easy-Moderate
The final W Trek day showcases massive Grey Glacier and iceberg-dotted Grey Lake, offering a completely different landscape from previous days while providing a more relaxed finale to the trekking experience. This day focuses on glacial environments, ice formations, and the dramatic scale of Patagonian ice fields.
🎥 Grey Glacier: Ice Giants of Patagonia (Glacier dynamics and iceberg formations)
Glacier Experience:
Suspension Bridge: Dramatic Grey River crossing with first glacier views and the sound of glacial meltwater rushing below
Multiple Beach Viewpoints: Various angles of glacier terminus and constantly changing iceberg formations floating in the lake
Optional Boat Tour: Close approach to glacier face revealing the massive scale and active calving processes (additional cost, weather dependent)
Ice Formations: Constantly changing iceberg sculptures in brilliant blues and whites, shaped by wind, waves, and melting
Solo Adventure Traveler Expert Tip: The Grey Glacier boat tour offers excellent value for solo travelers as tour operators often have last-minute single spaces available at discounted rates. The boat provides unique perspectives impossible from land and gets you remarkably close to the glacier face for dramatic photography and ice formation observation.
Day 5: Return Journey
Route: Grey → Return transport
Options: Catamaran across Grey Lake or return trek to park entrance
Most trekkers choose the scenic catamaran ride across Grey Lake, providing final glacier views and a relaxing end to the adventure. The boat connects to bus transport back to Puerto Natales, completing the W Trek circuit. The catamaran ride offers different perspectives of the glacier and icebergs while providing rest time for tired legs and reflection on the completed adventure.
For comprehensive wildlife encounters along the W Trek, including species identification tips, behavioral insights, and ethical viewing practices, see our complete wildlife guide.
The Full O Circuit: Complete Circumnavigation {#o-circuit-guide}
The “Backside” Experience (Days 5-8/9 of O Circuit)
The O Circuit’s additional section takes you into Torres del Paine’s remote wilderness, where crowds disappear and raw Patagonian nature dominates. This section includes the trek’s most challenging and rewarding segments, testing advanced outdoor skills while providing unparalleled wilderness immersion.
🎥 O Circuit Backside: Remote Patagonia Wilderness (Multi-day documentation of the full backside circuit)
Day 5: Grey to Paso John Gardner
Distance: 14km
Duration: 6-8 hours
Difficulty: Challenging
This day represents the transition from the popular W Trek to serious wilderness trekking, with the challenging ascent to John Gardner Pass testing physical conditioning and weather management skills.
Route Highlights:
Glacier Overlooks: Multiple perspectives of Grey Glacier’s upper reaches and feeder glaciers flowing from the Southern Patagonian Ice Field
John Gardner Pass (1,241m): Circuit’s highest point offering panoramic views across one of the world’s largest ice caps
Weather Exposure: Extreme wind potential requiring careful timing and advanced gear management skills
Continental Divide: The pass marks where Pacific and Atlantic watersheds separate, creating unique ecological zones
🎥 John Gardner Pass: Conquering the Circuit’s Highest Point (Extreme weather documentation and glacier views)
Pass Strategy:
Start early (6:00 AM) to avoid afternoon winds that can make the exposed pass dangerous or impassable
Comprehensive layer system essential for temperature variations from valley floor to alpine conditions
Clear weather provides views across the Southern Patagonian Ice Field extending to the horizon
Emergency shelter available at pass (weather refuge only) for emergency situations but not overnight accommodation
Solo Adventure Traveler Expert Tip: Solo trekkers should not attempt John Gardner Pass in marginal weather conditions. Unlike group travelers who can share decision-making responsibility, solo adventurers must make conservative weather decisions. Consider carrying a satellite communicator for emergency communication if conditions deteriorate unexpectedly.
Day 6: Paso John Gardner to Dickson
Distance: 12km
Duration: 4-6 hours
Difficulty: Moderate-Challenging
The dramatic descent from John Gardner Pass leads through varied terrain zones, from high alpine environments through forest transitions to the shores of Dickson Lake with its spectacular glacier backdrop.
Terrain Variety:
High alpine descent through loose rock and scree fields requiring careful foot placement and potential microspike use
Forest transitions through different elevation zones, showcasing diverse Patagonian plant communities
Lake approaches with expansive glacier vistas and opportunities for wildlife photography
Dickson Glacier: Spectacular terminus views with active calving and iceberg formations in the lake
Wildlife Opportunities: The Dickson area offers some of the circuit’s best wildlife viewing, particularly for pumas, as the reduced human presence allows more natural behavior patterns. Guanaco herds are common, and condor sightings increase significantly compared to the popular W Trek section.
Day 7: Dickson to Los Perros
Distance: 8km
Duration: 3-4 hours
Difficulty: Easy-Moderate
A deliberately shorter day designed to allow recovery before the challenging Paso de los Vientos crossing, this section travels through pristine forest environments and offers excellent wildlife viewing opportunities.
Day Highlights:
Recovery time for physical and mental preparation for the upcoming challenging pass crossing
Excellent wildlife viewing opportunities in the reduced-traffic environment
Forest environments showcasing old-growth lenga and ñire forests undisturbed by heavy tourism
Preparation time for gear organization and weather assessment for the notorious Windy Pass
Solo Adventure Traveler Expert Tip: Use this recovery day to connect with other trekkers at Los Perros campsite. The upcoming Paso de los Vientos is safer traveled in groups, even informal ones. Many solo trekkers form temporary partnerships for the challenging pass crossing while maintaining independent travel otherwise.
Day 8: Los Perros to Las Carretas (via Paso de los Vientos)
Distance: 16km
Duration: 8-10 hours
Difficulty: Very Challenging
🎥 Paso de los Vientos: Extreme Weather Challenge (Documenting the circuit’s most challenging section)
“Windy Pass” Challenges:
Extreme Winds: Sustained winds regularly exceed 100 km/h with gusts over 200 km/h recorded during storm events
Weather Timing: Only attempt crossing during stable weather windows with favorable forecasts for entire crossing duration
Technical Terrain: Loose rock sections, multiple unbridged stream crossings, and exposed scrambling requiring technical movement skills
Emergency Protocols: Established shelter locations and evacuation procedures for trekkers caught in dangerous conditions
Safety Requirements:
Monitor detailed weather forecasts closely and be prepared to wait additional days for safe crossing conditions
Carry emergency shelter, extra food for potential weather delays, and emergency communication devices
Travel in groups when possible – the extreme conditions make solo crossing inadvisable for safety reasons
Park rangers provide daily wind condition updates and may close the pass during dangerous weather
Solo Adventure Traveler Expert Tip: This is not a section for solo travel unless you have extensive mountaineering experience in extreme weather conditions. Most solo trekkers partner with others specifically for this crossing. The pass has a reputation for testing even experienced trekkers’ limits, and emergency rescue is complicated by weather and remote location.
Day 9: Las Carretas Return
The final day returns to civilization via well-maintained trails, completing the full circuit experience and providing time for reflection on one of Patagonia’s most challenging and rewarding wilderness adventures.
To understand timing your cross-border journey from Torres del Paine to Argentine destinations like El Calafate, our cross-border planning guide provides detailed logistics and transportation connections.
Planning Your Torres del Paine Adventure {#planning-guide}
Permits and Reservations
Torres del Paine requires advance planning that has become increasingly complex as visitor numbers have grown from 150,000 in 2010 to over 250,000 annually. Both camping and refugio accommodations fill months in advance, particularly during peak season (December-February), creating a booking system that requires strategic timing and backup plans. The reservation system was implemented to protect the fragile ecosystem from overuse while ensuring visitor safety through regulated capacity limits at each accommodation site.
🎥 Booking Strategy: Securing Your Torres del Paine Adventure (Step-by-step reservation process)
Reservation Timeline:
6 months ahead: Refugio bookings open for the following season (typically in May for the next summer season), with popular dates selling out within hours of release. Refugio operators (Fantastico Sur and Vertice Patagonia) use different booking systems and release dates, requiring monitoring of multiple websites. High-demand periods like New Year’s week often sell out within minutes.
3-4 months ahead: Camping permits become available through CONAF (Chilean Forest Service) online system, offering more flexibility than refugios but still requiring advance planning during peak periods. Camping permits are date-specific and non-transferable, with limited walk-in availability. The online system often experiences technical difficulties during high-demand periods.
1-2 months ahead: Final availability checks and itinerary adjustments become possible as some last-minute cancellations occur. This period also allows for weather-based itinerary optimization based on long-range forecasts. Solo travelers often find better availability during this period as single-person cancellations are more common than group cancellations.
Upon arrival: Permit collection and mandatory safety briefings at park entrance, where rangers provide current weather conditions, trail status updates, and emergency procedures. All visitors must register their intended routes and accommodation reservations, creating a safety tracking system for emergency response.
Solo Adventure Traveler Expert Tip: Solo travelers have advantages in the booking system – single spots often become available when groups reduce their size or families cancel. Monitor booking sites weekly during the 1-2 month window before travel, and maintain flexible arrival dates. Solo trekkers can often piece together different accommodation types (mixing refugios and camping) to create complete itineraries when uniform bookings aren’t available.
Key Booking Platforms:
Refugios: www.fantasticosur.com (Las Torres, Cuernos) and www.verticepatagonia.com (Frances, Grey, Dickson) operate independent booking systems with different policies, cancellation terms, and payment requirements. Each operator requires separate accounts and bookings, making itinerary coordination challenging. Payment typically required in full at booking with strict cancellation penalties.
Camping: www.parquetorresdelpaine.cl (CONAF official site) handles all park camping reservations with standardized pricing and policies. The system allows date-specific bookings with basic site information but limited detail about actual camping conditions or amenities. International credit cards sometimes experience processing issues, requiring backup payment methods.
Park Entry: Can be purchased on arrival with cash preferred (Chilean pesos) though credit cards increasingly accepted. Entry fees vary by nationality with higher rates for non-Chilean visitors. Payment includes basic park map and safety information sheet, though detailed trail maps require separate purchase.
Accommodation Strategy:
W Trek: Optimal strategy combines refugios for weather protection with camping for budget management and schedule flexibility. Most successful itineraries book refugios for challenging weather days (particularly Day 1 Torres Base and Day 3 French Valley) while camping during potentially calmer lake-side days. This hybrid approach reduces total costs while maintaining safety margins.
O Circuit: More camping required due to limited refugio availability on the remote backside section, particularly between Dickson and Las Carretas where only basic camping facilities exist. The John Gardner Pass crossing typically requires camping at either end, making weather forecasting crucial for safe passage timing.
Backup Plans: Always maintain alternative dates, routes, or accommodation types in case of cancellations, weather closures, or personal schedule changes. Experienced Patagonian travelers book multiple scenario options when possible, canceling unused reservations within policy deadlines to maintain flexibility.
External Resources:
Chile National Parks Reservation System – Centralized booking for all Chilean national parks
Torres del Paine Official Website – Current regulations and booking links
Patagonia Booking Guide – Independent booking strategies and tips
Transportation Logistics
Getting to Torres del Paine requires strategic planning as the park’s remote location limits transportation options and schedules, particularly during shoulder seasons when service frequency decreases significantly.
Getting There:
Puerto Natales: Primary gateway city offering the most transportation options (2-hour bus ride to park) with multiple daily departures during peak season
El Calafate: Argentine approach requiring border crossing (5-hour connection via Cerro Castillo border crossing) but offering access to combined Chile-Argentina itineraries
Punta Arenas: Main airport option requiring additional 3-4 hour overland travel to Puerto Natales, then onward to park
🎥 Transportation Guide: Every Route to Torres del Paine (Comparing all transportation options)
Bus Services:
Multiple daily departures from Puerto Natales during peak season (December-March) with reduced frequency during shoulder seasons
Seasonal service variations mean advance booking becomes crucial during high-demand periods
Return transportation should be booked upon arrival as popular departure times fill quickly
Private Transport:
Rental cars available but challenging road conditions, particularly the final 37km of gravel road to park entrance
Organized tour transport offering door-to-door service but limited schedule flexibility
Private transfer services providing personalized timing but at premium costs
Solo Adventure Traveler Expert Tip: Bus transportation works well for solo travelers as it’s cost-effective and provides opportunities to meet other trekkers. Book return transport immediately upon arrival, as popular afternoon departures back to Puerto Natales fill quickly. Consider staying an extra night in Puerto Natales after completing your trek to decompress and sort gear before onward travel.
Budget Planning
Torres del Paine costs vary dramatically based on accommodation choices, meal planning strategies, and seasonal timing, requiring careful budget planning to avoid unexpected expenses.
Cost Breakdown (per person, 5-day W Trek):
ItemBudget OptionMid-RangePremiumAccommodation$200-300 (camping + 1-2 refugios)$400-600 (mix refugios/camping)$800-1200 (all refugios, private rooms)Meals$100-150 (self-catered camping)$200-300 (mix self-catered/refugio meals)$400-500 (all refugio meal plans)Transport$50-80 (public bus)$100-150 (mix bus/private)$200-300 (private transfers)Park Entry$35 (standard fee)$35 (standard fee)$35 (standard fee)Gear Rental$150-200 (basic gear)$200-250 (quality gear)$300-400 (premium gear)Total$535-765$935-1335$1735-2435
Hidden Costs to Consider:
Boat transfer across Grey Lake (optional but popular): $25-35
Extra food and emergency supplies: $30-50
Gear replacement for damaged items: $50-100
Tips for guides and refugio staff: $20-40
Emergency accommodation if weather delays travel: $100-200
For detailed budget trekking strategies for Torres del Paine, including gear rental options, cost-saving tips, and seasonal pricing variations, see our comprehensive budget guide.
Accommodation Strategy: Refugios vs Camping {#accommodation}
Refugio Experience
Refugios offer comfort after long trekking days: hot showers, cooked meals, weather protection, and social atmospheres that create lasting connections between international trekkers. However, they’re expensive, book out quickly, and can feel crowded during peak season when dormitories fill to capacity.
🎥 Inside Torres del Paine Refugios (Complete refugio tour and amenities overview)
Refugio Locations and Operators:
Las Torres: Operated by Fantastico Sur, closest to Base Torres trek with stunning mountain views from dining areas and terraces. The refugio sits at the base of the famous towers, offering front-row seats to the alpenglow show each morning. Facilities include hot showers, restaurant service, and gear shop with essential supplies.
Cuernos: Fantastico Sur operation featuring stunning lake and mountain views from one of the most photographed refugio locations in Patagonia. Built directly on Nordenskjöld Lake’s shore, the refugio offers panoramic windows showcasing the dramatic horn-shaped peaks. Premium location comes with premium pricing.
Frances: Vertice Patagonia refugio providing French Valley access with views toward Paine Grande and the glacier-filled amphitheater. The refugio serves as base camp for French Valley exploration and offers protected accommodation during the often-windy conditions in this area.
Grey: Vertice Patagonia operation offering glacier views and direct connections to boat services across Grey Lake. The refugio provides front-row views of Grey Glacier and floating icebergs while serving as the endpoint for most W Trek adventures.
Dickson: Vertice Patagonia refugio serving O Circuit trekkers exclusively, providing remote wilderness accommodation with glacier views and wildlife viewing opportunities. This refugio sees significantly fewer visitors, creating a more intimate wilderness experience.
Refugio Amenities:
Dormitory accommodations (4-8 beds per room) and limited private room options at premium pricing
Breakfast and dinner meal plans featuring hearty Patagonian cuisine designed for hungry trekkers
Hot showers with adequate water pressure and heating (luxury after days of camping)
Gear drying areas with heated spaces for wet equipment during poor weather
Small shops stocking basic supplies, emergency gear, and overpriced snacks
Solo Adventure Traveler Expert Tip: Refugios offer excellent social opportunities for solo travelers, with communal dining creating natural conversation starters. Many solo adventurers find temporary hiking partners over refugio dinners. Book dormitory beds rather than private rooms to maximize social interaction and cost savings.
Camping Strategy
Camping offers budget-friendly accommodation with closer nature connection and flexibility for weather changes, though it requires carrying additional gear and managing comfort levels during challenging weather conditions.
🎥 Torres del Paine Camping Guide (Campground tours and setup strategies)
Established Campgrounds:
Torres Central: Near Las Torres trailhead with basic facilities and mountain views, serving as base camp for the classic towers trek. Facilities include toilets, cold-water taps, and windbreak structures, but expect crowded conditions during peak season.
Cuernos: Lakeside location offering spectacular Cuernos views with some of the park’s most photogenic camping spots. The campground provides excellent sunrise and sunset photography opportunities but exposure to lake winds requires secure tent setup.
Frances: French Valley access point with forest protection from winds and proximity to the dramatic valley entrance. This campground offers some weather protection but can become muddy during rainy periods due to forest floor drainage.
Grey: Glacier views and boat connection access with camping spots offering front-row seats to iceberg watching and glacier photography. The campground serves as the end point for many W Trek adventures with celebration atmosphere among completing trekkers.
Dickson: O Circuit exclusive campground providing remote wilderness camping with glacier views and increased wildlife encounters. Expect primitive facilities but authentic wilderness experience away from W Trek crowds.
Los Perros: O Circuit forest campground offering protection from weather before the challenging Paso de los Vientos crossing. The campground serves as staging area for trekkers preparing for the circuit’s most demanding section.
Camping Essentials:
Four-season mountaineering tent with proven wind resistance (standard camping tents fail catastrophically in Patagonian conditions)
Sleeping bag rated to -5°C minimum, with consideration for personal cold tolerance and potential temperature extremes
Insulated sleeping pad providing protection from ground cold and improving sleep comfort during long trekking days
Reliable tent stakes designed for rocky ground and guy-line reinforcements for extreme wind resistance
Comprehensive repair kit for tent and gear maintenance during extended expeditions
Solo Adventure Traveler Expert Tip: Solo camping requires extra safety considerations including informing others of your planned locations and carrying emergency communication devices. Many solo campers position their tents near other groups for informal safety networks while maintaining independence. Pack extra tent stakes and guy-lines as wind damage is common.
Wild Camping: Strictly prohibited within park boundaries with heavy fines and potential expulsion from the park. All camping must occur at designated campgrounds with proper permits and reservation confirmations. Rangers patrol regularly and enforce camping regulations strictly.
External Resources:
Torres del Paine Accommodation Guide – Official accommodation information
Refugio Comparison Reviews – Traveler reviews and photos of all refugios
Camping Equipment Rental Puerto Natales – Local gear rental options
Essential Gear for Torres del Paine {#gear-guide}
The Complete Packing List
Torres del Paine’s unpredictable weather demands versatile gear preparation that can handle conditions ranging from warm sunshine to horizontal rain and snow, sometimes within the same day. The key to successful gear selection lies in understanding layering principles, weight optimization, and durability requirements for Patagonian conditions.
🎥 Torres del Paine Gear Guide (Complete gear review and packing demonstration)
Layer System Strategy
Torres del Paine’s extreme weather variability demands a sophisticated layering system that can adapt to temperature swings of 20°C (36°F) within hours and conditions ranging from blazing sunshine to horizontal snow. The key principle involves three distinct layers that can be added or removed quickly as conditions change, rather than single heavy garments that provide limited adaptability. Understanding how these layers work together creates the difference between comfortable adventure and potential hypothermia situations.
Base Layer:
Merino wool or synthetic moisture-wicking tops and bottoms that maintain insulation properties even when damp, unlike cotton which becomes deadly when wet in cold conditions. Merino wool offers natural odor resistance crucial for multi-day adventures, while synthetic materials dry faster and cost less. The base layer should fit snugly without being restrictive, allowing for full range of motion during scrambling sections and steep ascents.
Avoid cotton at all costs in any weather conditions – cotton retains moisture, loses all insulating properties when wet, and significantly increases hypothermia risk in Patagonian conditions. Even cotton underwear can become dangerous during extended outdoor exposure in variable weather conditions.
Pack 2-3 base layer sets for multi-day treks, allowing for one wearing, one drying, and one clean backup. This rotation system ensures dry base layers are always available, particularly important for multi-day camping where drying time is limited and weather may prevent proper gear drying.
Solo Adventure Traveler Expert Tip: Solo trekkers should prioritize merino wool base layers over synthetics despite higher cost – the natural antimicrobial properties reduce odor concerns when sharing refugio dormitories, and superior temperature regulation helps manage exertion levels when hiking without group pace considerations. Pack one extra base layer beyond normal recommendations as solo travelers lack partners for emergency gear sharing.
Insulation Layer:
Down or synthetic insulated jacket providing core warmth during rest periods, early morning starts, and unexpected weather deterioration. Down offers superior warmth-to-weight ratios and compressibility but loses insulation when wet, making synthetic alternatives safer in consistently damp conditions. Modern synthetic insulation retains 80-90% of warmth when wet, though it’s bulkier and heavier than equivalent down.
Fleece or wool mid-layer for active warmth that breathes well during high-exertion periods like steep ascents while providing wind resistance on exposed sections. Quality fleece offers excellent versatility as outer layer during mild conditions or mid-layer during severe weather. Grid-pattern fleece provides optimal warmth-to-weight ratios while maintaining breathability.
Insulated pants for camp use, rest periods, and extreme cold conditions that may develop during multi-day adventures. These aren’t typically needed during active hiking but become essential for comfortable evenings at camping areas and refugios, particularly during shoulder season when temperatures drop significantly after sunset.
Shell Layer:
Waterproof, breathable jacket using Gore-Tex or equivalent technology that provides complete weather protection while allowing moisture vapor from exertion to escape. The shell layer represents your final defense against Patagonian weather and must be completely waterproof with sealed seams, waterproof zippers, and adjustable hood that fits over insulation layers and provides peripheral vision protection.
Waterproof pants are absolutely essential, not optional equipment in Torres del Paine where horizontal rain and snow are common occurrences. Many inexperienced trekkers underestimate the importance of lower-body protection, leading to dangerous situations when upper bodies stay warm while legs become hypothermic from wind and moisture exposure.
Wind-resistant soft shell for highly active periods when full waterproof protection causes overheating but wind protection remains necessary. Soft shells offer better breathability during high-exertion activities while providing moderate weather protection and superior durability against abrasion from boulder scrambling sections.
External Resources:
REI Layering Guide – Comprehensive layering principles and fabric comparisons
Outside Magazine Patagonia Gear Guide – Gear reviews specific to Patagonian conditions
Backpacker Magazine Layering Systems – Advanced layering strategies for variable conditions
Essential Technical Gear
🎥 Technical Gear Breakdown (Detailed equipment reviews and usage tips)
Navigation and Safety:
GPS device or smartphone with offline maps downloaded before arrival, as cellular coverage is extremely limited throughout most of the park and completely absent on remote sections of the O Circuit. Modern GPS units offer 20+ hour battery life and detailed topographic mapping, while smartphones provide backup navigation but require careful power management and weatherproof protection. Always carry backup power sources as cold Patagonian temperatures drain batteries 2-3 times faster than normal conditions.
Physical map and compass backup systems remain essential despite electronic navigation availability, as device failures occur frequently in extreme weather conditions and electronic devices can become damaged during river crossings or falls on boulder sections. The official CONAF park map provides basic trail information, while detailed topographic maps from JLM or Trekking Chile offer elevation profiles and advanced route details for off-trail exploration.
Emergency whistle for signaling rescue teams during emergencies when voice calls become impossible due to wind noise or voice strain. Three sharp blasts repeated at intervals represents the international distress signal recognized by park rangers and other trekkers. Plastic whistles work better than metal in freezing conditions and should be attached to shell jacket for immediate access.
First aid kit specifically designed for multi-day wilderness use, including blister treatment supplies (the most common medical issue), pain relief medication, elastic bandages for sprains, and emergency shelter materials. Blister prevention and treatment supplies are more important than advanced medical equipment for most trekkers, as foot problems cause more evacuations than serious injuries.
Headlamp with extra batteries and backup light source, as early morning starts and potential emergency night travel require reliable illumination. LED headlamps provide 40+ hour run times on low settings while offering bright spot beams for technical terrain navigation. Red light settings preserve night vision and reduce impact on other trekkers during early morning starts.
Solo Adventure Traveler Expert Tip: Solo trekkers should carry satellite communication devices (Garmin InReach, SPOT, etc.) for emergency communication when traveling remote sections, particularly the O Circuit backside. These devices enable two-way messaging, GPS tracking sharing with emergency contacts, and professional rescue coordination. Many solo adventurers share device costs by traveling in loose partnerships while maintaining independent hiking schedules.
Trekking Equipment:
Trekking poles are absolutely essential for stability in notorious Patagonian winds that can reach 100+ km/h, making balance difficult even on flat terrain. Quality poles with carbide tips provide secure placement on rocky surfaces, while shock absorption systems reduce joint stress during long descents over loose scree. Adjustable poles allow optimization for different terrain types and can double as emergency tent supports if gear fails.
Gaiters provide crucial protection against rocks, water, and debris entering boots during river crossings and loose scree sections that comprise significant portions of both W Trek and O Circuit routes. Waterproof gaiters prevent water entry during stream crossings while keeping small rocks from creating hotspots that lead to blisters during long hiking days.
Quality hiking boots with ankle support are strongly recommended over lightweight trail shoes due to loose boulder sections, ankle-twisting potential on uneven terrain, and protection requirements during scrambling sections. Full-grain leather or synthetic boots provide durability against abrasive granite surfaces while offering waterproof protection during inevitable stream crossings and wet weather exposure.
Camp shoes for refugio and campground use provide foot relief after long hiking days while meeting refugio requirements for indoor footwear. Lightweight sandals, camp slippers, or casual shoes reduce foot fatigue and allow proper boot drying overnight in accommodation areas.
Weather Protection:
Buff or balaclava for comprehensive wind protection of face, neck, and head areas that become extremely vulnerable during high-wind conditions common throughout the park. These versatile accessories can be configured multiple ways depending on weather severity and provide essential protection against windburn and heat loss from the head and neck region.
Sunglasses are absolutely essential for glacier glare protection and high-altitude UV exposure that intensifies significantly at elevation and reflects strongly off snow, ice, and water surfaces. Category 3 or 4 glacier glasses provide necessary protection against snow blindness and long-term UV damage, while wraparound styles offer peripheral protection against wind-driven particles.
Sunscreen with high SPF (30+) protection is crucial as Patagonian sun intensity increases significantly due to latitude, altitude, and reflection from snow, water, and granite surfaces that can cause severe burns even on cloudy days. The ozone layer is thinner at these southern latitudes, allowing more harmful UV radiation to reach the surface. Reapply every 2 hours during active periods and more frequently during high-reflection conditions near glaciers and lakes.
Waterproof gloves or mittens for hand protection during wet conditions and wind exposure that can quickly lead to dangerous heat loss from extremities. Mittens provide superior warmth but reduce dexterity for technical tasks, while waterproof gloves offer better functionality for equipment use and camera operation. Pack liner gloves for layering systems and backup protection if primary gloves become lost or damaged.
Gear Rental Options
Torres del Paine’s remote location and international accessibility make gear rental an attractive option for many adventurers, particularly those arriving by air from distant locations where baggage weight restrictions make carrying bulky equipment impractical. Local rental companies understand specific regional conditions and stock gear tested in Patagonian environments, often providing superior equipment knowledge compared to international alternatives.
Local Rental Sources:
Puerto Natales: Multiple established outfitters including Erratic Rock, Natales Rentals, and Base Camp offer comprehensive gear rental with local expertise about specific equipment performance in Patagonian conditions. These operators maintain extensive inventory including specialized items like four-season tents designed for extreme wind resistance and sleeping bags rated for local temperature ranges.
Torres del Paine: Limited rental options available at park entrance through Hosteria Las Torres and refugio operators, but selection is restricted and advance reservations required. Park-entrance rentals work for forgotten items or last-minute gear needs but shouldn’t be relied upon for complete equipment solutions.
Punta Arenas: Broader equipment selection available through outdoor retailers serving regional adventure tourism, requiring advance planning but offering potentially better pricing for extended rentals. Airport proximity makes this option viable for international travelers with early arrival schedules allowing time for gear acquisition.
Recommended Rental Items:
Four-season tents with local knowledge of wind resistance characteristics specific to Patagonian conditions where standard camping equipment often fails catastrophically. Rental companies stock tents proven in 100+ km/h winds and understand optimal setup techniques for different campground locations and soil conditions.
Sleeping bags with appropriate temperature ratings for specific travel dates and accommodation types, as temperature requirements vary significantly between seasons and elevation levels. Local rental companies understand microclimate variations and can recommend appropriate insulation levels based on specific itinerary details and personal cold tolerance.
Trekking poles, waterproof clothing, and technical accessories where quality and fit are crucial for safety and comfort but where purchasing new equipment isn’t cost-effective for single-trip use. Rental quality often exceeds personal gear budgets while providing access to professional-grade equipment.
External Resources:
Gear Institute Patagonia Gear Guide – Independent gear testing and reviews
Adventure Travel Trade Association Gear Guidelines – Industry standards for adventure gear
Outdoor Gear Lab Equipment Reviews – Comprehensive gear testing and comparisons
For comprehensive essential trekking gear for Torres del Paine, including specific brand recommendations based on local testing, rental versus purchase decision matrices, and seasonal equipment variations, reference our complete gear guide with partnerships with local rental operators who provide insider equipment knowledge.
Weather & Seasonal Considerations {#weather-guide}
Understanding Patagonian Weather
Torres del Paine sits directly in the path of the notorious Patagonian westerly winds, creating some of the world’s most unpredictable mountain weather systems. The park’s unique location between the Pacific Ocean’s maritime influence and the Southern Patagonian Ice Field’s continental effects generates rapid weather changes that can transform conditions from calm and sunny to life-threatening storms within 30 minutes. This meteorological volatility stems from the region’s position in the “Roaring Forties” and “Furious Fifties” latitude bands where unobstructed oceanic winds circle the globe with tremendous force.
The park’s weather patterns are further complicated by dramatic topographical variations, from sea-level lakes to 3,050-meter peaks, creating multiple microclimates within relatively small geographical areas. Temperature inversions are common, where valley floors experience severe conditions while higher elevations remain calm, or vice versa. Understanding these complex weather interactions becomes crucial for safe travel planning and daily decision-making throughout any Torres del Paine adventure.
🎥 Patagonian Weather Patterns (Time-lapse footage of rapid weather changes)
Solo Adventure Traveler Expert Tip: Solo trekkers must develop advanced weather reading skills as they lack group decision-making support during dangerous condition changes. Invest time learning to interpret cloud formations, barometric pressure changes, and wind pattern shifts. Carry a portable barometer and understand how rapid pressure drops (>3 millibars per hour) indicate incoming severe weather that may require immediate shelter seeking or route abandonment.
Season-by-Season Breakdown
Peak Season (December – February)
Temperatures: Range from 5-20°C (41-68°F) with occasional extremes reaching -5°C to 25°C during weather fronts or exceptional high-pressure systems
Daylight: Up to 17 hours of usable light, with sunrise around 5:00 AM and sunset near 10:00 PM during solstice periods, allowing for extended hiking days and flexible schedule management
Crowds: Highest visitor density with over 1,000 daily park entries during peak periods, creating congestion at popular viewpoints and accommodation shortages requiring advance planning
Weather: Most stable conditions relative to other seasons, but “stable” in Patagonia still means rapid changes and extreme wind events occurring regularly
Pros: Warmest temperatures reduce hypothermia risks, longest daylight hours provide safety margins for navigation, all park facilities and transportation operate at full capacity
Cons: Highest accommodation costs (2-3x shoulder season rates), crowded trails reduce wilderness experience, advance booking essential with limited flexibility for weather-related schedule changes
🎥 Peak Season Reality Check (Crowd levels and weather documentation)
Shoulder Season (October-November, March-April)
Temperatures: Range from 0-15°C (32-59°F) with greater variability and higher probability of snow events even during “warmer” periods
Weather: More variable conditions with increased precipitation frequency, stronger wind events, and rapid temperature fluctuations requiring comprehensive gear preparation and flexible itinerary planning
Crowds: Moderate visitor levels allow for more authentic wilderness experiences while maintaining reasonable accommodation availability and lower costs
Pros: Fewer crowds create better photography opportunities and wildlife viewing, lower accommodation prices (40-50% savings), autumn colors during March-April provide spectacular photography, spring wildflowers during October-November offer unique landscape beauty
Cons: Unpredictable weather increases safety risks and requires advanced outdoor skills, some facilities operate limited hours or close entirely, higher probability of trail closures due to weather conditions
Winter Season (May – September)
Temperatures: Range from -5 to 10°C (23-50°F) with extended periods below freezing and wind chill factors creating dangerous exposure conditions
Daylight: Reduced to 8 hours during June-July solstice period, severely limiting hiking timeframes and increasing navigation challenges
Weather: Snow accumulation possible at all elevations, extreme wind events (150+ km/h recorded), horizontal precipitation common
Accessibility: Many trails officially closed for safety, limited accommodation options, irregular transportation schedules
Pros: Ultimate solitude with minimal visitor presence, dramatic winter landscapes unmatched during other seasons, potential for aurora australis viewing during clear nights
Cons: Dangerous conditions require expert-level outdoor skills, limited rescue capability during severe weather, most facilities closed, emergency evacuation complicated by weather and reduced daylight
Daily Weather Patterns
Understanding typical daily weather evolution helps with activity planning and safety decision-making, though Patagonian weather regularly defies these patterns with little warning.
Morning (5:00-9:00 AM): Often represents the calmest period with potential for clear skies and stable conditions, making early starts strategically important for exposed sections and summit attempts. Temperature inversions frequently occur, creating warm valleys while higher elevations experience freezing conditions.
Midday (9:00 AM-3:00 PM): Wind typically increases as thermal heating creates pressure differentials, weather changes accelerate due to atmospheric instability, and cloud development begins from moisture-laden air masses moving inland from the Pacific Ocean.
Afternoon (3:00-7:00 PM): Strongest winds develop during this period with highest precipitation probability as frontal systems intensify. Many weather-related emergencies occur during afternoon hours when conditions deteriorate rapidly and trekkers are committed to exposed routes.
Evening (7:00-11:00 PM): Winds may calm as thermal heating decreases, but frontal weather systems often intensify during evening hours. Clear evening skies don’t guarantee stable overnight conditions, as weather fronts frequently move through during nighttime hours.
🎥 24-Hour Weather Cycle (Time-lapse showing typical daily weather evolution)
Wind Considerations
Patagonian winds represent the region’s most dangerous and distinctive weather characteristic. These winds originate from massive pressure systems moving across the Southern Ocean with minimal land obstacles to reduce their intensity. Torres del Paine’s topography creates natural wind tunnels and acceleration zones where already strong winds become extreme.
Wind Impact on Trekking:
Tent Selection: Four-season mountaineering tents become essential equipment rather than luxury items, as standard camping tents suffer catastrophic failure in routine Patagonian conditions. Tent failure during storms creates life-threatening exposure situations requiring emergency shelter and potential rescue operations.
Route Planning: Certain sections become impassable during high-wind events, particularly exposed ridges, lakeshores without natural windbreaks, and high passes like John Gardner Pass on the O Circuit. Rangers may close specific trail sections when winds exceed safety thresholds (typically 80+ km/h sustained).
Energy Expenditure: Strong headwinds significantly increase physical effort required for forward progress, potentially doubling energy expenditure during severe conditions. Crosswinds create balance challenges requiring constant attention and increased fall risks on technical terrain.
Safety Concerns: Risk of being blown off balance on exposed cliff sections, difficulty maintaining body temperature due to wind chill effects, and challenges with equipment management as gear can be blown away instantly if not secured properly.
Wind Forecasting Resources:
Local park ranger stations provide daily wind condition forecasts based on regional meteorological data and real-time observations from multiple park locations
Weather applications specific to Patagonia region (Windfinder, Windyty) offer detailed wind speed and direction forecasts with hourly resolution
Visual indicators include lenticular cloud formations that appear 6-12 hours before major wind events, and animal behavior changes as wildlife seeks shelter before severe weather arrives
External Resources:
Chilean Meteorological Service – Official weather forecasts and warnings
Mountain-Forecast.com Torres del Paine – Specialized mountain weather forecasting
Windfinder Patagonia – Detailed wind forecasting and historical data
For detailed optimal glacier viewing and climbing seasons and their relationship to weather patterns, seasonal wildlife behavior, and photography lighting conditions throughout the year, consult our glacier adventures guide with month-by-month activity recommendations.
For detailed optimal glacier viewing and climbing seasons and their relationship to weather patterns, seasonal wildlife behavior, and photography lighting conditions throughout the year, consult our glacier adventures guide with month-by-month activity recommendations.
Wildlife Encounters & Photography {#wildlife-photography}
Torres del Paine Wildlife Guide
Torres del Paine hosts diverse Patagonian wildlife, from massive Andean condors soaring overhead to curious guanacos grazing along trails. Understanding animal behavior enhances both safety and photographic opportunities while contributing to conservation efforts through responsible wildlife viewing practices. The park’s unique location at the convergence of different ecosystems creates habitats supporting species from Patagonian steppe, Andean mountains, and sub-Antarctic regions.
🎥 Complete Wildlife Documentary (All park species with behavior insights)
Iconic Species Encounters
Guanaco (Lama guanicoe)
Population: 3,000+ individuals within park boundaries, representing one of South America’s largest protected populations
Behavior: Curious but maintain distance, often approach humans within 20-30 meters before retreating, family groups led by dominant males during breeding season
Best Viewing: Open grasslands around Laguna Amarga, Pampas sections of O Circuit, and lake shores during early morning and evening feeding periods
Photography: Telephoto lens (200mm+) recommended for natural behavior shots, golden hour lighting ideal for warm tones against dramatic landscapes
🎥 Guanaco Behavior and Photography (Close encounters and behavioral documentation)
Andean Condor (Vultur gryphus)
Wingspan: Up to 3.2 meters (10.5 feet), making them one of the world’s largest flying birds
Flight Patterns: Thermal soaring most active during midday when thermals develop, often seen riding ridge lifts along mountain faces
Best Locations: French Valley thermal updrafts, high viewpoints along W Trek, and cliffs around Grey Glacier area
Conservation: Critically endangered with fewer than 6,000 remaining globally, making every sighting significant for species monitoring
Solo Adventure Traveler Expert Tip: Solo travelers often have better wildlife photography opportunities as they move more quietly and can wait patiently at optimal locations without group pressure to maintain schedules. Carry a lightweight telephoto lens and practice patience – the best wildlife shots often require 30+ minutes of waiting for perfect behavior moments.
Puma (Puma concolor)
Population: 50-100 individuals estimated within park boundaries, with populations increasing due to guanaco abundance and protection measures
Sighting Probability: Low but increasing with conservation efforts, approximately 5-10% chance for W Trek trekkers, higher on O Circuit remote sections
Best Areas: Laguna Azul region, remote sections of O Circuit between Dickson and Las Carretas, early morning and evening activity periods
Safety: Attacks on humans extremely rare, make noise when hiking in known puma areas, never approach if sighted
Chilean Flamingo (Phoenicopterus chilensis)
Seasonal Presence: September-April with peak numbers during breeding season (October-December)
Locations: Laguna Amarga (most reliable), smaller park lakes depending on water levels and food availability
Behavior: Filter feeding on algae and small crustaceans, often forming flocks of 50-200 individuals during optimal conditions
Conservation: Population stable but sensitive to disturbance, particularly during nesting periods when colonies abandon nests if approached
Lesser Rhea (Rhea pennata)
Characteristics: Large flightless bird standing up to 1 meter tall, endemic to Patagonian grasslands
Behavior: Males responsible for incubating eggs and raising chicks, often seen with groups of juveniles during summer months
Viewing: Open grasslands throughout park, particularly visible during W Trek lakeside sections
Speed: Can run up to 60 km/h when threatened, making them impressive subjects for action photography
Photography Ethics and Techniques
🎥 Ethical Wildlife Photography Masterclass (Techniques and distance protocols)
Ethical Guidelines:
Maintain minimum 25-meter distance from all wildlife (50+ meters for nesting birds and puma sightings)
Never feed animals or attempt to attract them with food, sounds, or movements that alter natural behavior
Use telephoto lenses rather than approaching closely, allowing natural behavior continuation
Respect nesting areas and breeding behaviors by observing from significant distances during sensitive periods
Leave no trace of human presence that might affect future wildlife use of areas
Technical Photography Tips:
Golden Hour Magic: Best wildlife lighting occurs 1 hour after sunrise and before sunset when warm light enhances animal colors and reduces harsh shadows
Weather Drama Enhancement: Don’t avoid challenging weather conditions – dramatic skies, storms, and changing light create compelling wildlife compositions
Foreground Elements: Use rocks, vegetation, or water features to add depth and context to wildlife portraits
Rule of Thirds Application: Position wildlife along compositional lines rather than centering, creating more dynamic and engaging images
Patience and Persistence: Wildlife photography requires significant time investment – budget 2-3 hours for quality encounters rather than quick snapshots
Behavioral Photography Opportunities:
Guanaco social interactions: Family group dynamics, territorial disputes, and communication behaviors
Condor flight patterns: Thermal soaring techniques, landing approaches, and interaction with wind currents
Puma hunting behavior: Stalking techniques, territory marking (tracks and scat), and interaction with prey species
Flamingo feeding: Filter feeding mechanisms, flock coordination, and courtship displays during breeding season
Landscape Photography Mastery
Torres del Paine offers world-class landscape photography opportunities that change dramatically with weather, seasons, and time of day. Understanding optimal conditions and techniques separates snapshot tourism from serious nature photography.
Iconic Shots and Advanced Techniques:
Torres Sunrise Mastery
Optimal Position: Left (eastern) side of base lagoon for classic tower reflections and foreground rock inclusion
Timing Strategy: Arrive 45 minutes before sunrise for setup and composition refinement, alpenglow begins 30 minutes before official sunrise
Equipment Requirements: Sturdy tripod essential for wind resistance, wide-angle lens (14-24mm) for comprehensive composition, neutral density filters for water movement control
Composition Techniques: Include lagoon reflection, use foreground rocks for depth, consider vertical orientation for tower emphasis
Cuernos Reflection Photography
Location Scouting: Multiple viewpoints along Nordenskjöld Lake offer different perspectives, scout during midday for evening return
Optimal Conditions: Calm water essential (early morning most reliable), overcast skies often provide better light than harsh sun
Technical Approach: Focus stacking for sharp foreground and background, polarizing filter to control reflections and enhance colors
Seasonal Variations: Different sun angles throughout year create varying light patterns and shadow effects on horn-shaped peaks
French Valley Drama
Perspective Options: Valley floor for amphitheater effect, lookout point for overview perspective, multiple angles during single visit
Weather Integration: Storm clouds enhance dramatic effect, don’t retreat during weather changes – often produce best images
Lens Selection: Wide-angle for scope capture, telephoto for glacier detail isolation, zoom lens for composition flexibility
Safety Considerations: Weather changes rapidly in valley – secure gear against wind, protect camera from precipitation
Solo Adventure Traveler Expert Tip: Solo photographers have significant advantages including unlimited time at optimal locations, ability to return to promising spots multiple times, and flexibility to chase dramatic lighting conditions. Invest in a quality lightweight tripod and learn to set up quickly in changing conditions. Many of the park’s best photography opportunities occur during marginal weather when other trekkers seek shelter.
For comprehensive capturing iconic Torres del Paine sunrise shots, advanced landscape photography techniques, and seasonal lighting variations, see our complete photography guide with month-by-month optimal shooting conditions.
External Resources:
National Geographic Photography Tips – Professional wildlife photography techniques
Outdoor Photography Magazine Patagonia Guide – Landscape photography in extreme conditions
Wildlife Photography Ethics Guidelines – Responsible wildlife photography practices
Safety & Emergency Protocols {#safety-guide}
Risk Assessment and Management
Torres del Paine’s combination of extreme weather, challenging terrain, and remote location requires comprehensive safety planning and risk management strategies. Understanding potential hazards and maintaining proper protocols can mean the difference between an epic adventure and a dangerous emergency situation requiring rescue operations. The park’s safety challenges stem from its location in one of the world’s windiest regions, combined with rapidly changing weather and significant distances from medical facilities.
🎥 Safety Protocols Documentary (Emergency scenarios and response procedures)
Primary Risk Factors
Weather-Related Risks:
Hypothermia: Most common serious medical emergency, occurring even during summer months when temperatures drop rapidly with weather changes. Wind chill can create life-threatening conditions even when air temperatures seem moderate. Early symptoms include uncontrollable shivering, loss of fine motor control, and mental confusion that impairs decision-making ability.
Wind Exposure: Risk of being physically blown off balance or knocked down during extreme wind events exceeding 100 km/h. Trekkers have been blown off trails, knocked into rocks, and unable to maintain balance on exposed sections. Wind can also instantly blow away unsecured gear, creating equipment emergencies.
Flash Weather Changes: Conditions can deteriorate from pleasant to life-threatening within 30 minutes, catching unprepared trekkers in dangerous situations. Temperature drops of 15-20°C combined with wind and precipitation create perfect storm conditions for hypothermia and emergency situations.
River Crossings: Water levels rise rapidly with rain, turning simple stream crossings into dangerous torrents. Several unbridged crossings on both W Trek and O Circuit can become impassable, trapping trekkers or forcing dangerous crossing attempts.
Terrain Hazards:
Loose Rock Sections: Particularly dangerous on Torres Base final approach where ankle injuries and falls occur regularly due to unstable boulder fields and loose scree slopes requiring scrambling skills.
Stream Crossings: Multiple unbridged crossings throughout both circuits, with water levels varying dramatically based on recent precipitation and glacial melt patterns.
Exposure Risks: Limited shelter options on high passes and exposed sections where trekkers become trapped during weather events with nowhere to retreat for protection.
Navigation Challenges: Weather can reduce visibility to near-zero within minutes, making trail following impossible even on well-marked routes. GPS devices become essential during whiteout conditions.
Solo Adventure Traveler Expert Tip: Solo trekkers face amplified risks as they lack partners for emergency assistance, decision-making support, and gear sharing during equipment failures. Carry redundant safety equipment including emergency shelter, backup navigation, and communication devices. Inform park rangers of detailed itinerary plans and maintain conservative decision-making thresholds for weather and terrain challenges.
Emergency Communication
Communication Options:
Cell Coverage: Extremely limited, available only near some refugios and park entrance areas, completely absent throughout most trail systems and all remote O Circuit sections.
Satellite Communicators: Garmin InReach, SPOT, or similar devices provide two-way messaging, GPS tracking, and emergency beacon capabilities essential for remote area safety. Devices require clear sky view and may have delays during severe weather.
Emergency Beacons: GPS-enabled personal locator beacons (PLBs) provide emergency-only communication directly to rescue coordination centers, requiring actual life-threatening emergencies for activation.
Park Rangers: Stationed at key locations during peak season, patrol regularly, and maintain radio communication networks for emergency coordination and daily safety briefings.
🎥 Emergency Communication Systems (Testing and using emergency devices)
Emergency Contact Numbers:
Park Emergency: +56 61 269 1931 (limited cell coverage required)
Carabineros (Chilean Police): 133
Medical Emergency (SAMU): 131
Tourist Emergency Hotline: +56 600 600 2626
Communication Protocol:
Provide exact GPS coordinates when possible
Describe nature of emergency and number of people involved
State current weather conditions and visibility
Indicate available shelter and supplies
Maintain communication schedule if possible
First Aid Essentials
Understanding wilderness first aid becomes crucial when medical evacuation may require hours or days depending on weather conditions and location accessibility.
Critical Skills for Patagonian Conditions:
Hypothermia Recognition and Treatment: Progressive symptoms from mild (shivering, poor coordination) to severe (altered mental state, loss of consciousness). Treatment involves preventing further heat loss, gradual rewarming, and emergency evacuation planning.
Blister Prevention and Treatment: Foot problems cause more trek terminations than any other medical issue. Proper prevention includes well-fitted boots, moisture management, and early treatment of hot spots before blisters develop.
Sprain and Strain Management: RICE protocol (Rest, Ice, Compression, Elevation) and evacuation decision-making for injuries that prevent continued hiking safely.
Altitude-Related Issues: Recognition and descent protocols for altitude sickness symptoms, though Torres del Paine elevations rarely cause serious altitude problems for most trekkers.
Recommended Wilderness First Aid Kit:
Comprehensive blister treatment supplies (moleskin, tape, antiseptic, needle for drainage)
Pain relief medication (ibuprofen, acetaminophen) for injury management and hypothermia treatment
Elastic bandage and tape for sprain support and injury stabilization
Emergency shelter (space blanket, bivy sack) for hypothermia prevention and emergency protection
Emergency whistle for signaling rescue teams when voice communication becomes impossible
Waterproof first aid reference card with emergency contact information and basic protocols
Weather Emergency Procedures
Severe Wind Protocol:
Seek immediate shelter (natural rock formations, refugio buildings, or established windbreaks) when sustained winds exceed 60 km/h
Secure all gear using multiple attachment points to prevent loss during extreme gusts that can exceed 150 km/h
Wait out extreme conditions rather than attempting to push forward through dangerous sections – patience saves lives
Communicate position to others if communication devices available, as rescue becomes impossible during extreme wind events
Hypothermia Prevention and Treatment:
Stay dry by changing wet clothing immediately and maintaining dry base layers through careful layering management
Maintain regular caloric intake even when appetite decreases – the body requires fuel for heat generation during cold exposure
Recognize early symptoms in yourself and others (shivering, poor coordination, mental confusion) before progression to dangerous stages
Emergency warming techniques include skin-to-skin contact, warm beverages if conscious, and gradual rewarming rather than rapid heat application
🎥 Weather Emergency Response (Real scenarios and proper response procedures)
Lightning Safety:
Avoid exposed ridges, metal objects, and tall isolated features during thunderstorms
Seek shelter in low areas away from water bodies when lightning activity increases
If caught in open terrain, assume lightning position (crouched, feet together, hands on knees) rather than lying flat
Wait 30 minutes after last thunder before resuming exposed travel
Medical Emergency Evacuation
Evacuation Methods:
Helicopter: Weather-dependent, expensive ($5,000-15,000), requires suitable landing zones and clear conditions
Ground Evacuation: Possible from some locations via vehicle access, weather-independent but time-consuming
Self-Evacuation: Walking out with assistance when injuries allow movement and conditions permit safe travel
Evacuation Decision Matrix:
Immediate Evacuation Required: Severe hypothermia, major trauma, heart problems, severe allergic reactions
Urgent Evacuation Needed: Serious sprains preventing walking, moderate hypothermia, significant bleeding
Monitored Self-Evacuation: Minor injuries manageable with first aid, stable weather conditions, communication maintained
Insurance Requirements:
Adventure travel insurance with helicopter evacuation coverage essential – standard travel insurance often excludes adventure activities
Medical coverage for treatment in Chilean healthcare system or medical repatriation to home country
Evacuation coverage minimums should exceed $100,000 due to extreme costs in remote Patagonian locations
For comprehensive Leave No Trace principles in Torres del Paine and environmental protection protocols that enhance safety while preserving wilderness character, reference our sustainable adventure guide.
External Resources:
Wilderness Medical Associates International – Wilderness first aid training and resources
National Association for Search and Rescue – Emergency response protocols and prevention
Mountain Rescue Association Safety Guidelines – Mountain safety best practices and protocols
Local Insights from Patagonian Guides {#local-insights}
Expert Knowledge from Two Decades of Guiding
Our partnerships with local Patagonian guides who’ve been leading treks in Torres del Paine for over two decades provide insights unavailable in standard guidebooks or online resources. These professionals understand the park’s subtle rhythms, weather patterns, wildlife behavior, and hidden gems that only come from thousands of days in the field. Their knowledge represents a combination of traditional gaucho wisdom, modern safety protocols, and intimate familiarity with every trail, campsite, and weather pattern in the region.
🎥 Local Guide Interview Series (5-part series with veteran Patagonian guides)
Carlos Mendoza – Head Guide, 25 Years Experience
“Torres del Paine teaches humility to everyone who visits. I’ve seen experienced mountaineers from the Himalayas humbled by conditions here, and complete beginners surprise themselves with what they accomplish. The key is respecting the environment, being prepared for anything, and understanding that Patagonia sets the rules – we just try to work within them.”
Carlos’s Essential Insights:
Weather Reading Mastery: “Learn to read lenticular clouds forming over the ice field – they appear 6-12 hours before major wind events. When you see them, prepare for extreme conditions and consider altering plans. The clouds look like flying saucers and indicate massive atmospheric disturbance approaching.”
Route Timing Strategy: “Start Torres Base trek at 4:30 AM not just for sunrise photos, but for safety – afternoon winds make the loose boulder descent extremely dangerous. I’ve seen too many ankle injuries from people attempting this section during windy conditions when balance becomes nearly impossible.”
Wildlife Behavior Patterns: “Guanacos are naturally curious but become protective of young during October-December breeding season. Give nursing mothers extra space (50+ meters) and never position yourself between adults and juveniles. Watch for ear positioning – ears back indicates agitation.”
Emergency Decision Making: “When weather deteriorates, make conservative decisions quickly. Groups that debate too long often find themselves committed to dangerous routes. If conditions feel marginal, they probably are – turn back and wait for better weather windows.”
Carlos’s Secret Weather Indicators:
Morning fog patterns that predict afternoon wind intensity
Animal behavior changes 12-24 hours before major weather events
Cloud formation speeds that indicate pressure system movement
Wind direction shifts that signal incoming frontal systems
Solo Adventure Traveler Expert Tip from Carlos: “Solo trekkers need to develop heightened environmental awareness since they lack group input for decision-making. I teach solo travelers to verbalize their observations and decision-making process – talking through situations out loud helps maintain clear thinking during stressful conditions. Also, always inform others of your specific route and timing plans.”
Maria Rodriguez – Wildlife Specialist, 15 Years Experience
“People come to Torres del Paine for the mountains, but they leave talking about the wildlife encounters. This park offers one of the few places where you can experience the complete Patagonian ecosystem in a single journey – from marine birds to high-altitude predators.”
Maria’s Wildlife Secrets:
Puma Tracking Knowledge: “Fresh puma tracks in mud near Laguna Azul area are usually within 24 hours of rainfall. Look for four-toe prints about 8cm wide with no claw marks visible. Pumas are most active during dawn and dusk when guanaco herds move to water sources.”
Condor Viewing Optimization: “French Valley thermals develop strongest between 11 AM and 3 PM, creating optimal condor viewing windows. Position yourself on the valley’s eastern side where birds catch thermals rising from sun-heated granite walls. Condors often circle 5-7 times before landing.”
Photography Ethics Implementation: “Use the ‘thumb test’ for wildlife photography distance – extend your arm and thumb toward the animal. If your thumb doesn’t completely cover the animal, you’re too close and should back away. This ensures natural behavior continuation and safety for both photographer and wildlife.”
Seasonal Wildlife Calendars: “October-December: guanaco birthing, increased puma activity. January-February: condor nesting, flamingo peak numbers. March-April: guanaco mating, rhea family groups. Each season offers different behavioral observation opportunities.”
Maria’s Conservation Insights:
Puma population recovery indicators and monitoring techniques
Climate change impacts on wildlife migration patterns
Tourist behavior effects on animal stress and adaptation
Traditional ecological knowledge from indigenous Tehuelche peoples
Hidden Gems and Secret Spots
🎥 Secret Torres del Paine Locations (Off-trail locations with local guide access)
Mirador Ferrier (Carlos’s Secret Viewpoint)
Location: 30-minute unmarked detour from French Valley main trail, requires local knowledge for route finding
Payoff: Unobstructed 270-degree views of Paine Grande massif with zero tourist crowds and optimal photography angles
Access Requirements: Local guide knowledge essential – route not marked on any tourist maps and requires basic scrambling skills
Best Timing: Late afternoon light (4-6 PM) provides dramatic lighting on granite faces with cloud formations
Condor Roost Site (Maria’s Wildlife Secret)
Location: Protected observation area near Grey Glacier accessible only with conservation permits
Experience: Evening condor gatherings where 5-15 individuals roost together, providing unprecedented behavioral observation opportunities
Access Protocol: Observation only from designated distances (100+ meters), extreme silence required, no photography flash permitted
Conservation Significance: Critical roosting site for regional condor population, disturbed only a few times per season for research purposes
Ancient Cave Paintings (Historical Secret)
Location: Tehuelche archaeological site accessible via unmarked trail requiring local knowledge
Significance: 8,000+ year old cave paintings depicting guanaco hunting scenes and astronomical observations
Access Requirements: CONAF permits required, local guide mandatory, maximum 6 people per visit
Cultural Respect: Sacred site requiring appropriate behavior and understanding of indigenous cultural protocols
Local Weather Prediction Methods
Traditional Gaucho Indicators:
Cloud Formation Analysis: Lenticular clouds 12 hours before wind, cap clouds indicating pressure changes, mare’s tail clouds suggesting frontal approach within 24-48 hours
Animal Behavior Monitoring: Guanacos seeking shelter 6-12 hours before weather changes, condors flying low indicating pressure drops, rheas moving toward forest edges before storms
Wind Pattern Recognition: Morning calm often precedes afternoon storms, wind direction shifts indicating frontal passage, sudden wind stops signaling severe weather approach
Pressure Change Sensitivity: Traditional barometric pressure awareness through joint pain, headaches, and atmospheric “feeling” that experienced locals develop over decades
Modern Forecasting Integration:
Micro-Weather Station Network: Real-time data from 12 remote locations throughout park providing hyperlocal forecasting accuracy
Satellite Imagery Analysis: Wind pattern analysis updated every 3 hours showing approaching weather systems 24-48 hours in advance
Local Knowledge Synthesis: Combining traditional indicators with modern meteorology for superior forecasting accuracy than either method alone
Cultural Context and History
🎥 Patagonian Cultural Heritage (Archaeological sites and gaucho traditions)
Indigenous Heritage Legacy:
Tehuelche People: Original inhabitants with 10,000+ year continuous presence in region, sophisticated nomadic culture adapted to extreme Patagonian conditions
Archaeological Evidence: Cave paintings, tool-making sites, and seasonal camp locations throughout park indicating complex hunter-gatherer society
Traditional Ecological Knowledge: Advanced understanding of wildlife behavior, weather patterns, and seasonal resource availability developed over millennia
Cultural Preservation: Ongoing efforts to document and preserve indigenous knowledge systems and archaeological sites
Gaucho Tradition Evolution:
Historical Development: European settlement bringing cattle ranching and gaucho culture beginning in late 1800s, adapting European techniques to Patagonian conditions
Traditional Skills: Horseback riding expertise, weather reading abilities, animal behavior understanding, and survival skills in extreme conditions
Modern Integration: Working estancias within park boundaries maintaining traditional cattle management while supporting tourism and conservation
Cultural Exchange Opportunities: Authentic gaucho experiences through working estancia visits, traditional skill demonstrations, and cultural interpretation programs
Conservation History Timeline:
1959 Park Establishment: Initial protected area designation recognizing unique landscape and wildlife values
1978 UNESCO Designation: World Biosphere Reserve status acknowledging global significance and conservation importance
Fire History Impact: Major fires in 2005 and 2011-2012 demonstrating ecosystem resilience and recovery while highlighting climate change vulnerabilities
Tourism Evolution: Growth from adventure destination for experienced trekkers to mass tourism requiring careful management balance
Solo Adventure Traveler Cultural Insight: Local guides often appreciate solo travelers’ deeper interest in cultural exchange and learning. Solo adventurers typically have more time for cultural conversations and show genuine curiosity about traditional knowledge. Many guides share their most interesting stories and insights with solo travelers who demonstrate respect for local culture and environment.
For insights on extending your Torres del Paine adventure into multi-week expeditions and accessing remote areas beyond standard trekking routes, see our complete expedition planning guide with advanced logistics and cultural integration opportunities.
External Resources:
Tehuelche Cultural Foundation – Indigenous cultural preservation and education
Patagonian Gaucho Traditions – Historical and cultural context
Conservation Patagonia – Modern conservation efforts and traditional knowledge integration
Sustainable Trekking Practices {#sustainability}
Leave No Trace in Torres del Paine
Torres del Paine’s fragile Patagonian ecosystem faces increasing pressure from over 250,000 annual visitors, creating urgent need for sustainable trekking practices that ensure this wilderness remains pristine for future generations while supporting local communities that depend on tourism. The park’s unique position at the convergence of multiple ecosystems makes it particularly vulnerable to human impact, while its cultural significance to indigenous Tehuelche peoples and local gaucho communities adds layers of responsibility for respectful visitation.
🎥 Sustainable Trekking Masterclass (Environmental impact reduction and community support)
The Seven Principles in Practice
1. Plan Ahead and Prepare
Book accommodations well in advance to prevent overcrowding at popular sites that damages fragile vegetation and wildlife habitat areas. Overcrowding leads to informal camping, trail widening, and increased waste generation that degrades wilderness character.
Research current weather conditions and seasonal closures to avoid unnecessary emergency evacuations that strain park resources and endanger rescue personnel during dangerous conditions.
Pack appropriate gear to minimize environmental impact through proper equipment that reduces need for emergency supplies, fires, or shelter construction that damages natural areas.
Understand park regulations thoroughly before arrival to prevent violations that require ranger intervention and impact other visitors’ wilderness experiences.
2. Travel and Camp on Durable Surfaces
Stay on designated trails exclusively, avoiding shortcuts that cause severe erosion in Patagonia’s fragile soils that can take decades to recover from trampling damage. Single footsteps off-trail can create lasting scars in sensitive vegetation areas.
Use established campsites only with designated tent platforms where available – wild camping is prohibited throughout park to prevent habitat destruction and wildlife displacement from traditional use areas.
Avoid trampling fragile vegetation in camp areas by concentrating activities on already-impacted surfaces rather than spreading impact to pristine areas surrounding campsites.
Walk single file on narrow trails to minimize trail widening impact that destroys adjacent vegetation and creates multiple parallel trails requiring expensive restoration work.
🎥 Trail Impact Prevention (Proper hiking techniques and surface protection)
3. Dispose of Waste Properly
Pack out all trash including organic waste like apple cores and banana peels that don’t decompose properly in Patagonian climate and attract wildlife to human use areas, altering natural behavior patterns.
Use established toilet facilities when available, which feature composting systems designed for local conditions and high visitor volume during peak season periods.
For backcountry needs when facilities unavailable: dig cat holes 15-20cm deep and 70+ meters from water sources, trails, and campsites in organic soil that promotes decomposition while preventing water contamination.
Never wash dishes, brush teeth, or use soap directly in lakes or streams – carry water 70 meters away from water sources and use biodegradable soap sparingly to prevent water contamination that affects aquatic ecosystems.
4. Leave What You Find
Don’t move rocks or build unauthorized cairns that interfere with navigation systems and alter natural landscape appearance that has developed over thousands of years of natural processes.
Leave natural artifacts, interesting rocks, fossils, and plant specimens undisturbed for others to enjoy and for continued ecosystem function – collection removes materials from natural processes.
Don’t pick flowers or collect “souvenirs” that removes genetic material from plant populations and reduces visual beauty for subsequent visitors experiencing the same areas.
Respect archaeological sites and indigenous cultural artifacts by observing only – these represent thousands of years of human heritage requiring protection for cultural and scientific value.
5. Minimize Campfire Impacts
Use established fire rings only where specifically permitted and when fire danger levels allow safe burning without risk of escaped fires that have devastated large park areas in recent years.
Keep fires small and manageable using only dead and down wood found locally rather than breaking branches from living trees that damages forest ecosystems.
Burn wood completely to ash and ensure complete extinguishment by pouring water on ashes, stirring thoroughly, and feeling for residual heat before leaving any fire site.
Consider portable stoves instead of fires for cooking needs – stoves have less environmental impact and work better in windy Patagonian conditions that make fire management challenging.
6. Respect Wildlife
Observe all animals from minimum 25-meter distances (50+ meters for pumas, nesting birds, and animals with young) to prevent stress that alters natural behavior patterns and energy expenditure crucial for survival.
Never feed wildlife intentionally or leave food accessible that creates dangerous dependency on human food sources and aggressive behavior toward future visitors.
Store all food properly in designated areas or bear canisters to prevent wildlife access that habituates animals to human food sources and creates dangerous associations.
Report any aggressive or unusual animal behavior immediately to park rangers who monitor wildlife health and human-wildlife conflict situations requiring management intervention.
7. Be Considerate of Other Visitors
Keep noise levels low since sound carries extremely far in mountain environments and wildlife depends on natural sound cues for predator detection and communication.
Yield trail to uphill hikers who are working harder and have more difficulty stopping safely on steep terrain without losing momentum and balance.
Take photographs without blocking trails, viewpoints, or other visitors’ experiences by being aware of group impact on popular locations during peak visitation periods.
Respect quiet hours in campgrounds and refugios (typically 10 PM – 6 AM) to allow proper rest for trekkers facing challenging days requiring physical and mental preparation.
Solo Adventure Traveler Sustainability Tip: Solo trekkers often have lower per-person environmental impact due to more efficient resource use and greater flexibility to avoid crowded areas during peak impact periods. Use this advantage to demonstrate sustainable practices to other visitors and choose accommodations/routes that support local conservation efforts rather than mass tourism operations.
Environmental Impact Reduction
Carbon Footprint Management:
Choose overland transport when possible (bus travel vs flights) to reduce aviation emissions that constitute the largest environmental impact of most Patagonia trips from distant origins.
Offset unavoidable flights through verified carbon offset programs that support reforestation, renewable energy, or direct climate action projects in Patagonia region when possible.
Support local businesses exclusively to reduce transport emissions from imported goods while strengthening local economy that provides incentives for conservation and sustainable tourism development.
Pack lightweight, durable gear to reduce transportation impact from shipping heavy equipment and replacement costs for failed gear during expeditions.
Water Conservation Practices:
Use biodegradable soap sparingly and always 70+ meters away from water sources to prevent aquatic ecosystem contamination that affects fish, amphibians, and drinking water quality.
Limit shower time in refugios where water heating requires significant energy generation and hot water availability affects other guests’ comfort and facility sustainability.
Carry water purification systems to reduce plastic bottle consumption that creates waste disposal problems in remote areas lacking recycling infrastructure.
Report water leaks, waste, or infrastructure problems to facility management to improve efficiency and reduce environmental impact of tourism operations.
🎥 Water Conservation Practices (Practical water use reduction techniques)
Supporting Local Communities
Economic Impact Strategy:
Hire local guides and porters when available to ensure tourism revenue supports families living in the region rather than external operators extracting profits to distant locations.
Purchase supplies, food, and services in Puerto Natales rather than bringing everything from home to support local economy and reduce transportation environmental impact.
Choose locally-owned accommodations, restaurants, and service providers over international chains to keep tourism revenue within communities affected by tourism impacts.
Buy authentic local crafts as souvenirs directly from artisans rather than mass-produced items imported from distant manufacturing locations.
Cultural Respect and Integration:
Learn basic Spanish phrases for respectful interactions that demonstrate cultural interest beyond purely transactional tourism relationships.
Understand and respect local customs, traditions, and social protocols that have developed over generations of adaptation to Patagonian conditions.
Ask permission before photographing local people and respect privacy of communities that live and work in areas affected by tourism.
Show genuine interest in local culture, history, and environmental challenges beyond just scenic landscapes and adventure opportunities.
Community Initiative Support:
Reforestation Projects: Post-fire recovery efforts require volunteer support and funding for native species restoration that will take decades to reestablish forest ecosystems.
Trail Maintenance Programs: Community groups maintain extensive trail systems through volunteer labor and equipment contributions that keep trails safe and minimize environmental impact.
Environmental Education: Local schools teach conservation principles to children who will inherit responsibility for protecting these landscapes from increasing tourism and climate change pressures.
Wildlife Monitoring: Citizen science projects track animal populations, migration patterns, and human impact effects that# Complete Torres del Paine Trekking Guide 2025: W Trek vs O Circuit with Video Trail Documentation
Last Updated: September 2025 | Reading Time: 35 minutes
About Me
Veb
Hey there! I’m Veb and I've traveled solo and in groups for 10+ years in Patagonia - across Chile and Argentina.
I started Go Wild Patagonia with a desire to help other travelers plan their journeys in Patagonia with a focus on adventure, nature and being in the wilderness.
Say Thanks
Support my mission to make Patagonia more accessible for travelers while supporting local tour operators who organize only sustainable travels in Patagonia.
Read More
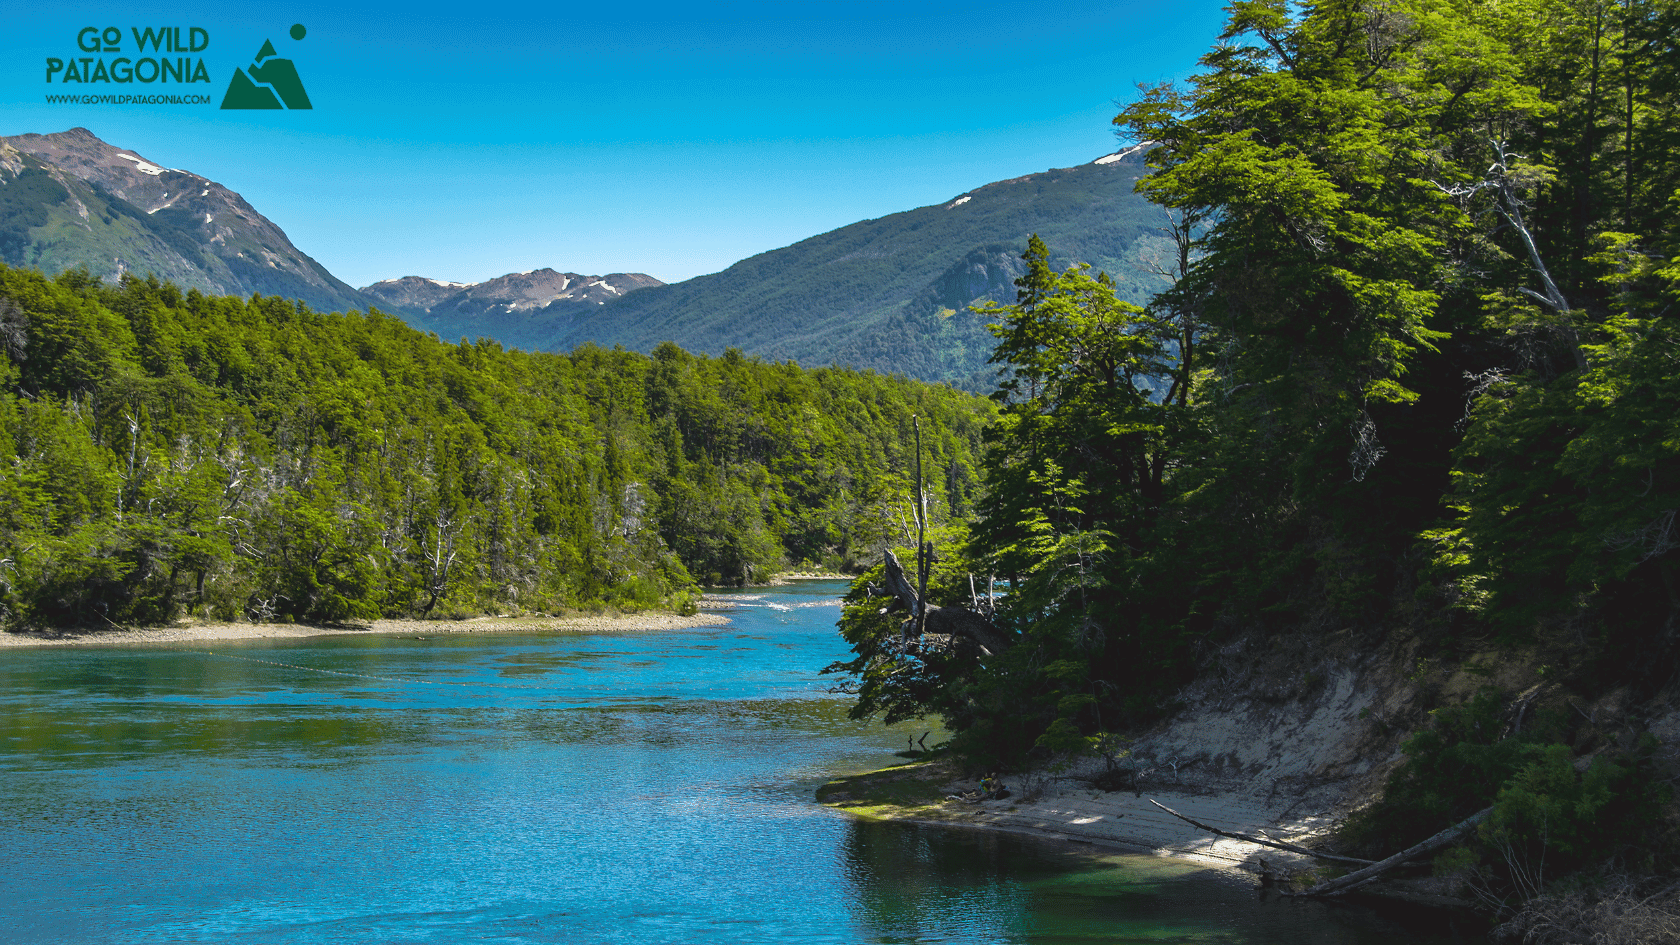
Chubut Province, Argentina — Cathedral of Ancient Trees Overview Los Alerces National Park protects 263,000 hectares of pristine Valdivian rainforest in Argentine Patagonia, home to some of the oldest living trees on Earth. The park's namesake—the alerce tree (Fitzroya cupressoides)—can live over 3,000 years, rivaling California's sequoias and bristlecone pines.
Update on Oct 24, 2025

El Bolsón offers world-class hiking: Refugio Hielo Azul and Refugio Cajón del Azul sit in alpine cirques accessible via multi-day treks, Cerro Piltriquitrón (2,284m) provides panoramic summit views, and Cajón del Azul's turquoise canyon ranks among Patagonia's most photographed day hikes.
Update on Oct 24, 2025

Monte Leon National Park is Argentina's first coastal national park, protecting 40 km of dramatic Atlantic shoreline where the Patagonian steppe meets the sea.
Update on Oct 24, 2025
